
Blog
Capsule Wardrobe for City Living: 12 Pieces, 30+ Outfits

Ever opened your wardrobe before a dinner and thought, “I’ve got clothes… but no outfit”? Same. I live in London, commute on busy trains, and bounce from work things to last-minute plans. To stop the wardrobe panic, I built a 12-piece capsule Wardrobe for City Living that carried me through a month — 34 outfits, variable weather, and zero frantic shopping.

What you’ll get: a precise 12-item checklist, outfit formulas, warm/cold swaps, cost-per-wear logic, care tips, and a quick shopping plan.
Human note: I hemmed my wide-legs by 2 cm and added rubber taps to my loafers — tiny tweaks that made them all-day wearable.
Why a Capsule Works in the City
- Space: City flats aren’t walk-in-wardrobe friendly. A tight edit means less clutter and faster mornings.
- Time: Repeatable outfit formulas remove decision fatigue. Grab, go, done.
- Budget: Fewer, better pieces with strong cost-per-wear beat trend churn.
- Sustainability: Buying less, choosing quality, and mixing pre-loved keeps style high and waste low.
The Urban Reality (and the Capsule Wardrobe for City Living Fix)
| Urban challenge | Capsule solution | Impact |
|---|---|---|
| Small wardrobe space | Multi-use pieces in a compact edit | Frees storage, cuts clutter |
| Four seasons in a week | Layering-friendly staples | Adapts to weather without panic buys |
| Trend temptation | Invest in durable heroes + pre-loved | Better CPW, less waste |
| Time pressure | Go-to outfit formulas | Faster mornings, consistent style |
The Exact 12 Pieces (with specs that actually help)
I keep the palette neutral (black/navy/white/camel) with one accent (mine’s a stripe). Choose fits that flatter you, not the algorithm.
- Dark-wash jeans — Mid/high rise; 12–13 oz denim; ankle hemmed to your length.
- White tee — 180–220 gsm cotton or cotton-modal; slightly relaxed crew.
- Lightweight knit — Merino or cotton, hip length; layers under a blazer.
- Button-up shirt — Poplin or Tencel; slightly oversized (works as overshirt).
- Structured jacket — Tailored blazer or short trench; shoulder fit first.
- Wide-leg trousers — Breathable twill; hemmed for flats/loafers.
- Go-to dress (midi/LBD) — Machine-washable if possible; easy to layer.
- Knee-length skirt or smart trousers — Lined if wool; office-ready.
- Great coat — 70%+ wool (or insulated); knee length; neutral.
- Statement shoes — Leather boots/loafers/heels; grippy soles for pavements.
- Everyday bag — Structured, neutral; crossbody option; fits bottle + charger.
- Signature jewellery — Hoops or a simple pendant you’ll actually wear.
Outfit Formulas That Run My Week
Build from base + layer + shoes + one detail.
- Jeans + white tee + blazer + loafers → coffee → desk → smart-casual dinner
- Jeans + knit + boots + coat → chilly commute
- Dress + blazer + heels → presentation or dinner date
- Trousers + tee + blazer + loafers → office days
- Skirt + button-up + loafers → polished but easy
- Button-up (open) + tank + jeans + trainers → weekend errands
Warm-weather swaps: tee solo, shirt as light jacket, sandals, woven textures.
Cold-weather swaps: add tights/thermals, switch to boots, wool coat + scarf.
30+ Outfits from 12 Pieces (quick matrix)
Mix these first; you’ll hit 30 before you know it.
- Jeans → tee → (blazer / knit / coat) → loafers / boots / trainers
- Trousers → tee or button-up or knit → loafers / heels / boots
- Dress → blazer or knit-over-top + belt → heels / boots + tights
- Skirt → tee or button-up → loafers / trainers → add blazer/coat
Tip: Photograph 10 favourites and pin them inside your wardrobe door. Decision fatigue: gone.
Seasonal Layering in Real Life (London)
- Shoulder season (10–17 °C): tee → knit → blazer; compact umbrella lives in the bag.
- Warm spell (20–25 °C): shirt open over a tank; trousers with sandals; dress + crossbody.
- Cold snap (≤ 8 °C): tee → knit → wool coat + scarf; tights with dress/skirt; boots over loafers.
Cost-Per-Wear: Where I Invest vs Save
| Item | Price | Wears/yr | CPW |
|---|---|---|---|
| Wool coat | £220 | 75 | £2.93 |
| Leather loafers | £95 | 90 | £1.06 |
| Dark jeans | £70 | 120 | £0.58 |
A £5 tee won’t last 500 wears, and a £100 tee won’t do 10,000—aim for a sensible middle.
- Invest: coat, everyday bag, leather footwear, denim that truly fits.
- Save: tees, lightweight knits, shirts (tailoring beats “premium” labels).
- Pre-loved: brilliant for coats, blazers, and bags — check measurements and fabric, not just brand.
Care, Tailoring & Storage (small habits that pay off)
- Care: cotton shirts on gentle; knits inside-out in a mesh bag; spot-clean coats; comb pilling monthly.
- Tailoring: hem to your shoe height; nip waist on trousers/skirts if they shift.
- Storage: off-season in breathable bags with cedar; rotate shoes with inserts; keep go-to outfits photographed.
Shopping Checklist (copy/paste)
- Dark-wash jeans (ankle)
- White tee (x2), mid-weight
- Lightweight neutral knit
- Poplin/Tencel button-up
- Tailored blazer or short trench
- Wide-leg trousers (hem to flats)
- Midi/LBD dress (machine-wash if possible)
- Skirt or second smart trouser
- Wool/insulated coat
- Leather boots/loafers/heels (choose one “signature”)
- Structured neutral bag (crossbody strap)
- Everyday hoops/pendant
Conclusion
If your wardrobe feels loud but somehow says nothing, a small capsule is the quiet fix. Twelve pieces is enough. I’ve worn this set through work days, wet commutes, last-minute dinners, and the odd Sunday slump, and it just…works. The trick isn’t buying more; it’s choosing better, hemming what you own, and sticking to a palette that plays nicely together. When I’m rushed, I pull one of my go-to formulas (jeans + tee + blazer, or dress + coat + boots) and I’m out the door in five.
Start with a quick audit tonight: keep what fits and feels good, note the gaps, and write a short shopping list. Add one upgrade (coat, shoes, or bag) and let the rest be simple. Take a few mirror photos of outfits you actually like—future you will thank you on a sleepy morning.
That’s it. Fewer pieces, more outfits, less stress. If you try this, tell me what your twelve are—I’m nosy and always up for swapping ideas.
FAQ
Can 12 pieces really cover work, dinners, and weekends?
Yes — layers and footwear shift the mood. See the matrix above.
I already own half — what now?
Do a 15-minute wardrobe audit. Fill obvious gaps (usually: a coat that fits over blazers, shoes you can walk in, and a bag that carries real life).
Where should I spend vs save?
Spend on the coat, bag, and shoes; save on tees/shirts and tailor for fit.
What real people say (quick tips)
- Capsules aren’t “no-buy”; they’re curated.
“A capsule wardrobe just means limiting and curating… It doesn’t mean you never buy clothing again.” Reddit
Use it: Add to your intro/FAQ to set expectations and reduce guilt around occasional upgrades.
- Include tailoring in cost-per-wear.
“Second-hand pants $40 + $60 tailoring + taxes—what do you include in cost?” Reddit
Use it: Expand your CPW table with a “true cost” column (purchase + tailoring + care).
- Laundry cadence shapes capsule size.
“Fewer clothes and I do laundry less often—most items get 2–3 wears before washing.” Reddit
Use it: Add a note in “Care” about planning capsule size around laundry frequency.
- Fight impulse buys by removing triggers.
“Delete the shopping apps; style what you own into new outfits instead.” Reddit
Use it: Quick tip box in “Shopping Checklist”—shop your closet first, then list gaps.
- Dark/neutral bases make mixing easy.
“Bottoms darker and neutral, tops add color.” Reddit
Use it: Drop under “Colour Palette” as a simple rule of thumb.
- City weather = plan layers, not more clothes.
“Seasonality broke my capsule until I split it and planned for climate swings.” Reddit
Use it: In “Seasonal Layering,” suggest a small off-season box + swap schedule.
- Jeans: keep to dark/straight for versatility.
“Black or dark wash; straight to relaxed fit. Save light/super slim for summer.” Reddit
Use it: Add as a spec note under “Dark-wash jeans.”
- Coats: buy durable, consider pre-loved.
“Barbour lasts decades; great used on eBay.” / “Vintage Aquascutum 100% wool—night and day vs cheap coats.” Reddit+1
Use it: Strengthen your “Invest” section with a one-line pre-loved callout.
- UK basics that actually fit.
“M&S for jeans/trousers—three lengths. John Lewis cashmere is good.” Reddit
Use it: Small UK-specific sidebar for readers who ask “where do I buy?”
- CPW reality check.
“$5 tee won’t last 500 wears; $100 tee won’t do 10,000 either—find the reasonable middle.” Reddit
Use it: One sentence beneath your CPW table to keep expectations sane.

If you feel your company is constantly adding—another product, another tool, another report—without getting faster or clearer, the one in one out rule is the fix. The idea is simple: for every new item you add (a SKU, a meeting, a tool, a report, a process step), you retire one that’s less valuable. It’s constraint on purpose. And constraint, when applied thoughtfully, sharpens focus, reduces waste, and creates room for the work that actually moves the numbers.
Below is a field-tested playbook to apply the one in one out rule across inventory, operations, software, and teams—without stalling growth or morale. You’ll get decision criteria, scripts, templates, and the small set of KPIs that prove it’s working.
Why constraint grows businesses (and clutter slowly kills them)

Complexity creeps. A product line inches wider, a tech stack bloats, meetings multiply. None of those add-ons are harmful on their own; together they slow decisions, hide accountability, and burn margin. Intentional constraint flips the script:
- Speed: Less to maintain means fewer handoffs, faster cycles, and shorter queues.
- Quality: Teams go deeper on fewer things. Defects and rework drop.
- Focus: Priorities are visible. Every new “yes” requires an explicit “no.”
- Cash: Working capital tied in stale stock or idle software seats is released.
Think of the one in one out rule as a governor on complexity. It doesn’t stop growth; it filters it.
What exactly is the one in one out rule?
At home, it’s keeping your wardrobe in check: buy a jacket, donate a jacket. In business, it turns into a decision standard: add a new SKU only by retiring a weak performer; add a new tool only by decommissioning an overlapping one; add a weekly report only by removing a lower-value report. The goal isn’t austerity—it’s net-neutral complexity unless value clearly improves.
Working definition for teams:
“We add something only if we remove something of equal or greater complexity, cost, or maintenance.”
Where to apply it (and how to set the rules)
Start where clutter costs you most: inventory dollars, cycle time, seat licenses, or manager time. Then write a one-page policy so the rule is real, not a slogan.
Candidate areas
- Inventory/SKUs: Product line creep, slow movers, duplication by color/size.
- Processes: Extra handoffs, shadow approvals, copy-paste reporting.
- Technology stack: Redundant apps, unused modules, scattered data.
- Meetings and reports: Standing meetings with no agenda, autopilot decks.
- Roles and responsibilities: Overlapping job scopes, unclear ownership.
Implementation guardrails (put these in writing)
- Trigger: Any request to add a SKU/process/tool/meeting triggers “find one out.”
- Owner: The requester must propose the removal candidate(s) with a short rationale.
- Approval: A small review group (ops + finance + domain leader) decides within 5 working days.
- Exceptions: Safety, compliance, and revenue-critical launches can override—but must schedule a specific removal within 60 days.
Inventory & product: make room for winners
Most companies carry too many SKUs, tying up cash and effort. Use one in one out to keep the line sharp and profitable.
A three-step SKU rationalization using the rule
- Rank by truth, not vibes: 12-month revenue, gross margin %, units, returns, and pick/pack complexity.
- Define the floor: If a SKU is below the floor on margin or velocity and has a close substitute, it’s a retirement candidate.
- Trade with intent: When Product requests a new variant or bundle, identify one to retire—ideally a long tail item or duplication.
SKU trade template (internal form)
- New SKU purpose: (customer/job-to-be-done)
- Expected cannibalization: (which SKUs, how much?)
- Retirement candidate(s): (SKU code + 12-mo units + GM%)
- Sell-through plan for retired item: (markdown, bundle, outlet timeline)
Product retirement checklist
- Notify sales with talking points and alternatives
- Freeze reorders; run down stock with discounts
- Update website, catalogs, and pick lists
- Close open POs; adjust forecasts and BOMs
- Archive photography and content with status “retired”
Processes: stop the silent spread
Every extra step has carrying cost. If Ops wants to add a control or a report, something must go.
How to audit and apply one in one out
- Map one value stream from order to cash (or lead to live). Count touches and decisions.
- Tag each step: value-adding (customer would pay), necessary non-value (compliance), or waste.
- Apply the rule: Any new step or approval must replace a waste step of similar effort.
Before/after table (example)
Area Before After (one in one out applied) Result Sales ops approvals 3 signatures for custom pricing 1 signature + auto-threshold for small deals Quote time –48% Weekly reporting 7 decks emailed 2 dashboards in BI; 5 reports retired Prep time –8 hrs/wk Fulfillment Print-pick-pack-verify Digital pick + weigh station; paper print retired Error rate –32%
Meetings & reporting: give time back

A calendar is a budget. Spend it like money.
Meeting rule-of-thumb
- Add a new standing meeting? Retire a different one (or halve the new cadence).
- No agenda, no meeting. No decisions in two cycles, it sunsets.
- Convert status reads to dashboards; use meetings for blockers and decisions.
Report rule-of-thumb
- Add one metric to the dashboard? Remove one metric nobody uses.
- Add a new KPI deck? Merge with an existing deck or retire it.
Quick form to request a new meeting/report
- Purpose and decision types
- Required attendees (≤7 for decisions, others async)
- Success measure (e.g., NPS of meeting, cycle time change)
- Proposed retirement: meeting/report to end and why
Technology stack: fewer apps, clearer data
Software sprawl is expensive and confusing. Apply the rule to licenses and overlap.
Tool consolidation steps
- Inventory your apps: owner, cost, users, purpose, overlapping features.
- Score by usage: active users (%), depth of features used, and criticality.
- Trade deliberately: If Marketing wants another point solution, retire an overlapping tool or a module elsewhere.
Acquisition framework (simple)
- Problem statement and measurable outcome
- Redundancy check: which current tools could do this 80%?
- Data flow impact (sources/targets)
- Decommission plan for the tool we’ll retire (date/owner)
Technical debt guardrail: No net-new tool without a signed-off decommission plan for the overlap it replaces.
People and roles: clarity beats headcount math
This rule isn’t a “swap a person for a person.” It’s about role clarity and capability.
How to apply it ethically
- When adding a role, merge or retire overlapping responsibilities elsewhere. Avoid creating two half-owners for the same outcome.
- Prefer reskilling and role redesign over reflex backfilling.
- Publish a RACI for key processes so “who decides” is obvious.
Example
- Adding a RevOps analyst? Retire the shadow spreadsheet/reporting workload inside Sales and Finance; move it to a single source of truth.
Make it stick: your 30-day rollout plan

Week 1: Decide and publish
- Pick two pilot domains (e.g., SKUs and meetings).
- Write a one-page policy with triggers, owners, and exceptions.
- Elect a small review group (Ops, Finance, domain lead).
Week 2: Baseline and train
- Snapshot KPIs (below).
- Run 45-minute enablement for managers with request templates.
- Set a 5-day SLA for approvals.
Week 3: Pilot
- Process 100% of new requests through the rule.
- Track approvals, swaps, and exceptions in a simple log.
Week 4: Review and expand
- Share wins and friction points.
- Tighten criteria; expand to software and reports.
- Schedule quarterly rationalization days.
How to measure success (and prove it fast)
Pick a handful that reflect less clutter and more flow.
Core KPIs
- SKU count & long-tail %: total active SKUs; % of revenue from bottom 50% of SKUs
- Inventory health: weeks of supply; obsolete stock as % of inventory
- Cycle time: quote-to-order, order-to-ship, ticket-to-resolution
- Meeting load: total meeting hours per manager per week; % meetings with decisions recorded
- Tool sprawl: active apps per employee; orphaned licenses; overlapping features retired
- Cost to serve: ops cost per order or per ticket
- Net dollar retention / gross margin: do fewer, better offerings lift unit economics?
Decision log (keep it lightweight)
Date Add Remove Area Owner Expected impact Review date 06 Nov New mid-tier bundle Retired 2 slow SKUs Product PM +3 pts GM on bundle 60 days 06 Nov Roadmap review mtg (monthly) Retired weekly status Meetings COO –3 hrs/wk exec time 30 days
Scripts and templates your managers will actually use
New thing request (60 seconds)
- “I’m proposing X to achieve Y by Z date. To keep us net-neutral, I propose we retire A (usage/data), or B if we need more impact. Here’s the decommission plan.”
Pushback script
- “We can’t add the new tool until we pick which redundant tool to retire. Which one unlocks the most complexity reduction?”
Exception script (rare)
- “This is safety/compliance/contractual. We’ll grant a 60-day exception. By DATE, we’ll name the item to retire and schedule the decommission.”
Real-world vignettes (composite, anonymized)
- DTC apparel brand: Added a seasonal capsule only by retiring six colorways that drove <1% of sales each. Result: SKU count –14%, cash tied in inventory –22%, sell-through +9 pts.
- B2B SaaS: Wanted a separate customer survey tool. Applied the rule, consolidated into the existing CX platform, retired three overlapping tools. Result: vendor count –3, license cost –28%, single source of truth for NPS/CSAT.
- IT services: Introduced a weekly “hot issues” stand-up; retired two passive status meetings; converted updates to a dashboard. Result: –5.5 manager hours/week, MTTR –19%.
Common mistakes (and how to avoid them)
- Counting additions but delaying the removals: Tie decommission dates to approvals. No date, no launch.
- Letting exceptions multiply: Track them; require a named retirement within 60 days.
- Over-rotating to zero growth: The rule isn’t “never add”; it’s “add with intent.” Big bets can be exceptions—time-boxed and measured.
- Socializing endlessly: Keep the approval group small. Decide in five working days or it isn’t a constraint; it’s a bottleneck.
One in one out for small businesses and solo founders
- Inventory: Cap the total SKUs you can physically hold; if you add, you discontinue something and announce the swap to customers.
- Time: Add a new weekly meeting/client deliverable? Remove or merge something else on your calendar.
- Tools: Cap monthly software spend (e.g., ≤3% of revenue). New app in, old app out.
- Content: New blog/newsletter series? Archive or consolidate a lower-performing one.
Helpful tables you can paste into your SOPs
Decision criteria by area
Area Add if… Remove if… SKU Distinct job-to-be-done, margin target met, proven demand <X units/12 mo, below margin floor, duplication Process step Cuts cycle time or defects; required for compliance No measurable value, repeats info, adds handoff Tool Replaces ≥2 tools; integrates with core data; lowers TCO <30% active users; overlaps features; no owner Meeting/report Clear decisions, unique audience, metrics not in BI No decisions for 2 cycles; content lives elsewhere
Before/after savings (illustrative)
Benefit What it looks like in real life Rough annual savings* Lower stock waste Long-tail SKUs retired; FIFO enforced $25k–$150k Faster prep 5 decks replaced by 2 dashboards 200–400 hrs Fewer licenses 3 tools consolidated to 1 20%–40% on SaaS Easier handoffs One approval instead of three –15% cycle time *Varies by size and industry.
Conclusion: subtraction is a growth strategy
The one in one out rule isn’t minimalism for its own sake. It’s leadership saying, “We’re serious about focus.” When you trade additions for removals, teams stop hoarding, calendars breathe, and your best work gets daylight. Start with two pilots (SKUs and meetings), measure a handful of outcomes, and keep a public decision log. In 90 days you’ll feel the lift: fewer stalls, clearer priorities, better unit economics. Growth by subtraction isn’t a slogan—it’s operational muscle you can build.
FAQs
What if every team claims their thing is essential?
Make the requester propose the retirement. If everything is essential, nothing is. Require data (usage, margin, cycle time) in every request.
Won’t this slow innovation?
It speeds useful innovation by removing clutter. Exceptions are allowed—but time-boxed, measured, and followed by a planned removal.
How do we avoid analysis paralysis?
Use a simple scorecard (impact, effort, cost, overlap). Decide within five business days. Perfect is the enemy of shipped.
What KPIs prove it’s working?
Weeks of supply, SKU count and long-tail %, cycle time, meeting hours per manager, active apps per employee, license cost, ops cost per order, gross margin.
How do we handle customers who love a retiring SKU?
Offer a migration: comparable alternative, bundle, or final limited run. Communicate early and clearly.
We’re regulated. Can we still use the rule?
Yes. Compliance can be an exception—but pair every exception with a scheduled removal or simplification elsewhere.
What about hiring—does one in one out mean no growth?
No. It means clear role design. When adding, consolidate overlapping responsibilities to avoid duplication and keep ownership crisp.
Can this work in a startup?
It’s ideal. Set constraints early: cap tools, cap meetings, cap SKUs. You’ll scale cleaner, faster, and cheaper.
How do we keep momentum after the first month?
Quarterly rationalization days, a visible decision log, and a standing 30-minute “complexity council” to review adds/removes.
What’s the smallest step I can take today?
Kill one recurring meeting and retire one unused tool license—then announce what you removed and why. Small, public wins build the habit.
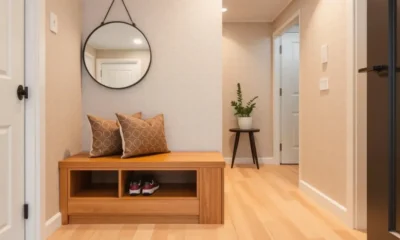
If your keys wander, shoes pile up, and mail sprawls across the first flat surface you see, you’ll love this: entryway organization for a small apartment isn’t about buying more stuff; it’s about putting every inch to work with a calm, repeatable system. The goal is a landing zone that catches life at the door—coats, bags, shoes, parcels—without eating precious square footage or risking your deposit. Below you’ll find real measurements, layouts that fit tight hallways, renter-safe installs, and simple habits that keep the space tidy on autopilot.
Start here: map the space you actually have

- Measure width, depth, ceiling height, and door swing (front door + any closet doors).
- Note “traffic lines”: the natural path from door → kitchen/living. Furniture should never jut into that line.
- Find vertical opportunities: above-door voids, the 30–72 cm (12–28 in) between door trim and corner, and awkward nooks you’ve been ignoring.
- Decide the non-negotiables for your household: one hook per person, hidden shoe storage, a mail drop, and a spot for umbrellas/dog leash.
Typical small-entry footprints (and what fits)
| Entry width | What fits comfortably | What to avoid |
|---|---|---|
| 60–75 cm (24–30 in) hallway | Narrow wall rack, over-door unit, slim shoe cabinet (≤18 cm/7 in) | Deep consoles, bench deeper than 35 cm (14 in) |
| 90–110 cm (35–43 in) | Slim console with drawers, 2–3 wall hooks, umbrella stand | Cube benches, bulky coat trees |
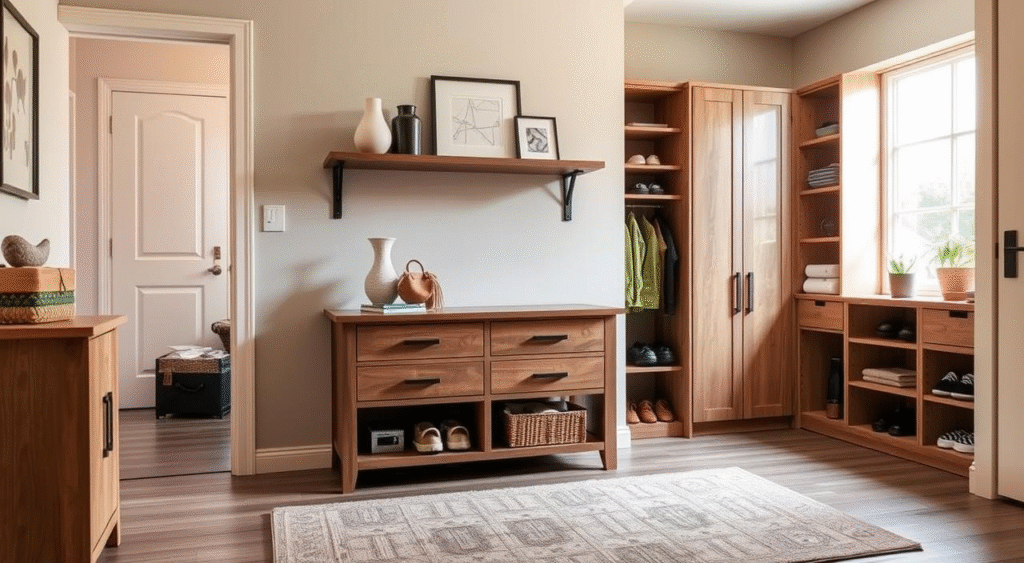
| 120+ cm (47+ in) | Closed shoe cabinet + bench, gallery shelf, peg rail | Freestanding wardrobes unless recessed |
Layouts that always work (pick one and commit)
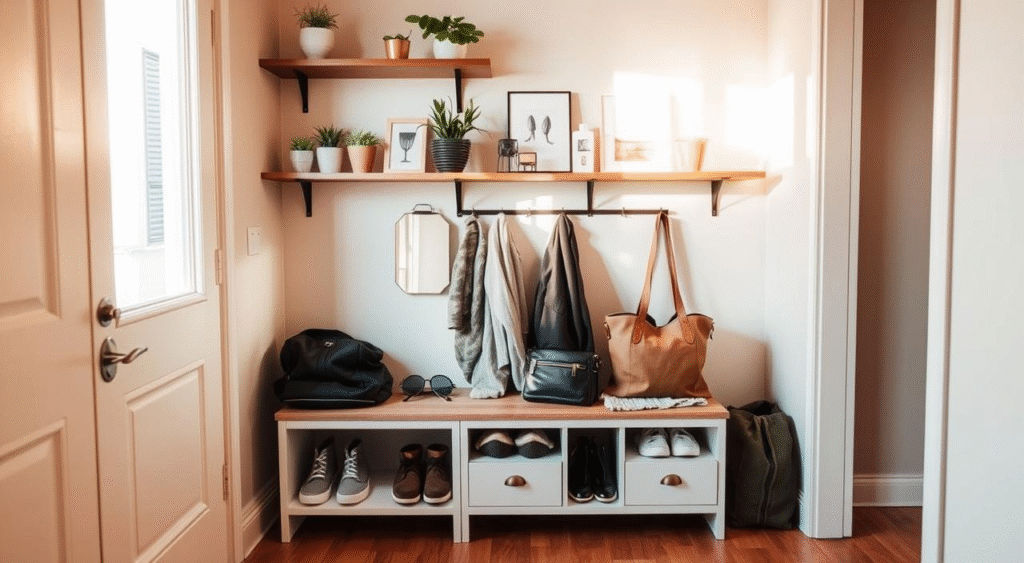
The Slim Spine (for corridors): one continuous vertical “spine” on the wall with upper shelf + peg rail + shoe cabinet below. Everything stacks, nothing protrudes.
The L-Corner: use the short wall near the hinge for hooks, long wall for a narrow console. Turn the corner with a mini basket tower.
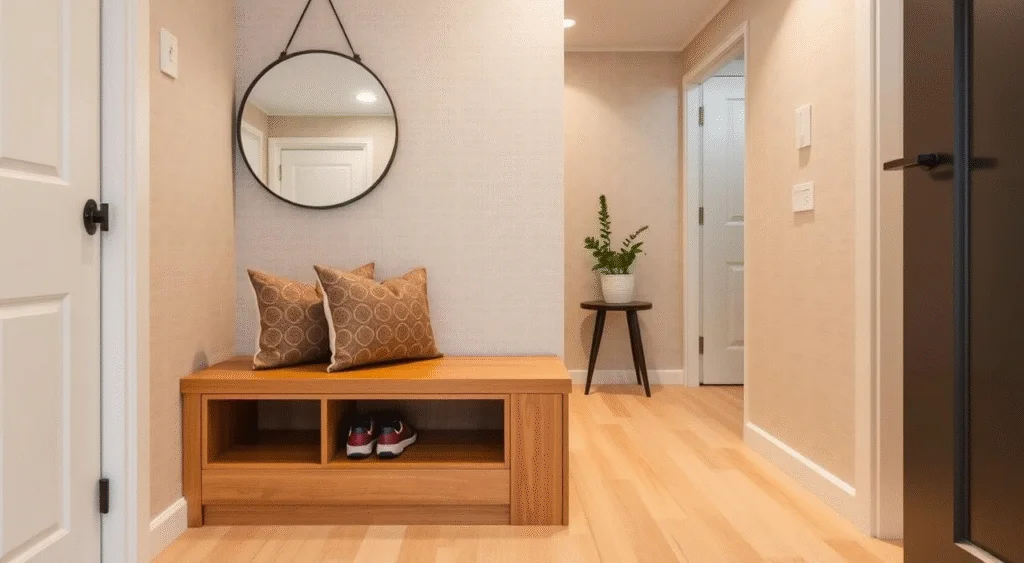
The Bench Block: low, closed shoe storage doubles as a bench; floating shelf above for keys and mail; hooks centered between.
The Door-Back Workhorse: over-door rack (coats/bags) + over-door fabric pockets (gloves/hats/masks). Keep the wall clear to widen the feel.
Vertical first: make the walls carry the load
- Floating ledge (8–12 cm/3–5 in deep): holds trays, sunglasses, postage—without feeling bulky.
- Peg rail (at 140–155 cm / 55–61 in from floor): one peg per person + two “guest” pegs. Pegs keep coats from stacking on chairs later.
- Above-door shelf (use 2 brackets into studs if allowed or compression poles if not): seasonal baskets for hats, mittens, spare bulbs.
- Magnetic strip by the door (if your frame is steel): keys and dog lead live here—micro habit changer.
“Small entries aren’t storage problems; they’re decision problems. Give every item a default home within arm’s reach of the door.”
Renter-friendly installs (no holes required)
- Adhesive hooks: choose weight rating ≥2× what you plan to hang. Clean with isopropyl, press 30 seconds, let cure.
- Tension rails/rods: inside alcoves for hanging S-hooks and baskets. Great above radiators where consoles won’t fit.
- Over-door systems: look for felt-padded arms and adjustable hook clearances so doors still latch.
- Leaners: ladder shelves and lean mirrors add vertical function without hardware.
Shoe storage that doesn’t eat the hallway
- Flip-down shoe cabinets (depth 12–18 cm / 4.7–7 in): unbeatable in tight corridors.
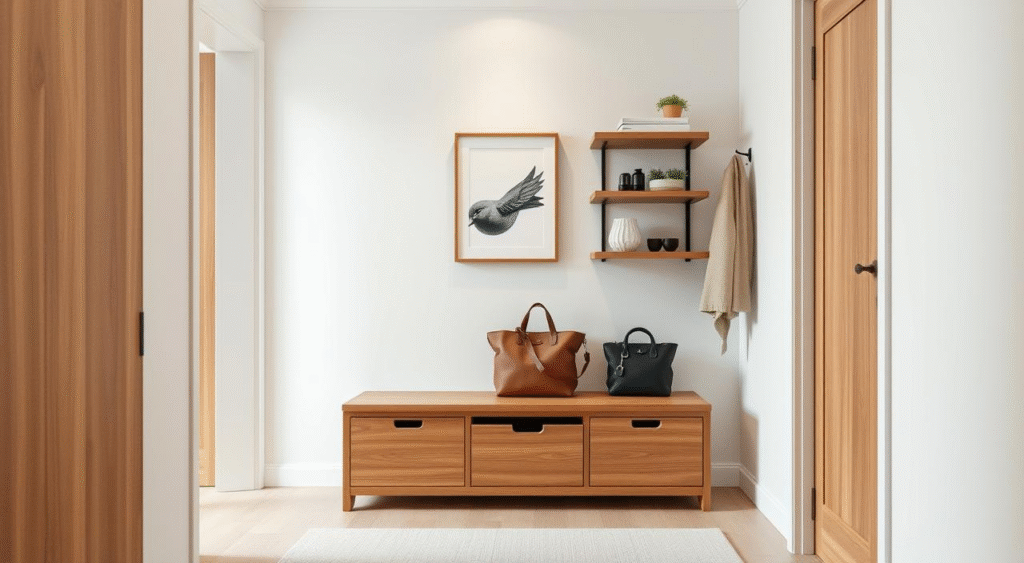
- Bench with drawers, not open cubbies: hides visual clutter and dust; top doubles as seat.
- Under-bench rolling tray: for wet boots—line with a boot mat.
- Seasonal rotation: only the current week’s shoes at the door; everything else in under-bed bins.
Quick chooser: which shoe solution fits you
| Need | Best option | Why it works |
|---|---|---|
| Very narrow hall | Flip-down cabinet | Ultra-shallow, wall-hugging |
| Kids + daily chaos | Closed bench drawers | Fast stash, soft-close safer for fingers |
| Pet households | Boot tray on casters | Contains mud, easy to roll out and mop |
| Style display | Ladder shelf with boxes | Vertical, airy, easy to curate |
Surfaces that stay clear (even on busy mornings)
- Use an inset tray on your ledge/console for “drop zone” discipline (keys, wallet, earbuds). When the tray is full, you sort—built-in limit.
- Stand mail vertically in a file or magazine rack labeled In / Out / To shred.
- Pen + sticky pad live on a tiny command-mounted cup—sign for parcels without hunting.
Light, mirrors, and the “bigger room” trick
- Mirror opposite the door (or at 90°) bounces light and widens the corridor.
- Plug-in sconce with cord cover or a battery picture light over the ledge makes the entry glow like a hotel—instant calm.
- Warm bulbs (2700–3000K) flatter coats and skin tones; harsh light makes clutter feel worse.
Style the workhorses so they look intentional
- Repeat two finishes max (e.g., black metal + oak) across hooks, frames, and shelf edges for a quiet, unified look.
- Choose lidded baskets for top shelves—visual silence. Label the inside front so tags don’t shout at you.
- Add one living element (a small plant or sprig in a bud vase). It signals “this space is cared for,” which nudges tidiness.
A five-item toolkit that solves 90% of problems
- Adhesive hooks (mixed weights)
- Narrow tray (drop zone)
- Slim shoe cabinet or closed bench
- Floating ledge (keys/mail)
- Over-door multi-hook (overflow coats/bags)
The 7-minute daily reset (really)
- Shoes into cabinet, coat on peg, bag on same peg every time.
- Empty tray: keys stay, receipts move to In, junk mail to Shred.
- Quick swipe of the ledge and mirror.
- Weekly: vacuum the threshold, launder the boot mat, clear the “Out” pile.
Budget pathways (under $50, under $150, under $300)
| Budget | What to buy | Why it’s enough |
|---|---|---|
| ≤ $50 | 6 adhesive hooks, over-door rack, small tray, two fabric bins | Hooks do the heavy lifting; bins hide hats/gloves |
| ≤ $150 | Slim console/ledge, mirror, closed shoe bench or flip-down | Adds surfaces + closed storage + visual width |
| ≤ $300 | Add peg rail, plug-in sconce, above-door shelf with baskets | Vertical capacity + better light = lasting order |
Micro-spaces: when your “entry” is basically a door
- Command ledge (keys), over-door rack (coats), boot tray (shoes), and a wall file (mail) stacked in 45 cm (18 in) of wall. Done.
- Use the hinge-side sliver: a 10 cm (4 in) deep vertical rail can hold 4–6 hooks with zero crowding.
Families, pets, and shared flats
- Color-code hooks (or add name tags) so kids stop “borrowing” each other’s pegs.
- Leash station by the door: hook + treat tin + roll of bags in a command cup.
- Roommates: one hook + one shoe slot per person, labeled. Overflow lives in bedrooms—house rule.
Cleaning plan that won’t wreck your rental
- Felt pads under benches and cabinets; they glide without scuffing.
- Boot mats catch gravel; shake outdoors weekly.
- If you must use adhesive, warm it with a hair dryer before removal; pull tabs straight down to avoid lifting paint.
Common mistakes (and easy fixes)
- Too deep furniture in a narrow hall: swap to a flip-down or wall rail—keep depth under 18 cm (7 in).
- All open storage: convert the biggest visual offender to closed (bench drawer or lidded baskets).
- Hooks too high/low: center peg rail at 145 cm (57 in) so coats don’t drag or loom.
- One lonely hook: add enough capacity for real use—one per person plus guest and gym bag.
Sample setups you can copy
The Corridor Calm (75 cm/30 in wide)
- Flip-down shoe cabinet (80–100 cm wide)
- Floating ledge above with 30 cm tray
- Peg rail for 4 pegs
- Over-door rack for guests
- Runner rug to visually elongate
The Studio Nook
- Closed bench (80–100 cm) with two drawers
- Round mirror (60–80 cm) above
- Slim wall file (In/Out) + small table lamp (plug-in)
- Two baskets under bench: scarves & gym kit
Quick reference: what each solution does best
| Solution | Best for | Watchouts |
|---|---|---|
| Flip-down shoe cabinet | Narrow halls, visual calm | Needs wall contact; check baseboard cuts |
| Closed bench | Families, pet homes | Measure depth; choose wipeable finish |
| Peg rail | Fast coat access | Don’t overload with bags + coats on one peg |
| Floating ledge | Key/mail control | Keep depth shallow to avoid bumps |
| Over-door rack | Renters, zero wall space | Pad the hooks to protect paint |
small entry, big routine
A tiny entrance can run like a well-oiled station when walls do the lifting, surfaces stay shallow, and every person has a clear home for their stuff. Start with one layout (Slim Spine, L-Corner, Bench Block, or Door-Back), choose closed storage for shoes, and install a ledge + peg rail at human height. Add a mirror for light, a tray to limit clutter, and a seven-minute reset that happens on autopilot. Do this, and your entryway organization for a small apartment will hold up on the busiest days, not just after a weekend tidy.
FAQs
How deep should entry furniture be in a narrow hallway?
Keep it under 18 cm (7 in) for flip-downs and under 35 cm (14 in) for benches. You should move past without shoulder bumping.
What’s the best shoe storage when I have no width?
A flip-down cabinet or a wall-mounted shoe rack with angled shelves. Both hug the wall and clear the walkway.
How high should I mount hooks?
Aim for 145 cm (57 in) to center. Add a low set at ~100 cm (39 in) if kids share the space.
Can I organize without damaging walls?
Yes—adhesive hooks, tension rails, over-door systems, and leaners. Clean surfaces before mounting and let adhesives cure for best hold.
How do I keep the surface clear?
Use a tray as a visual quota. Stand mail vertically in a labeled file, and empty the tray every night during your seven-minute reset.
What rug works best for entries?
Low-pile, washable runner with a non-slip underlay. Dark or patterned hides city grit and pet paw prints.
Where do umbrellas and wet boots go?
Boot tray with a lip under the bench and a slim umbrella stand or wall hook with a drip tray. Line trays with a cut-to-fit rubber mat for easy cleaning.
I rent—what’s safe to mount?
Go for adhesive hardware rated for weight, over-door organizers, and furniture that leans or stands. If you must drill, ask first and use existing studs; patch/paint on move-out.
What if my entry is literally a door opening into the living room?
Use a command ledge for keys, a wall file for mail, an over-door rack for coats, and a slim shoe tray. One meter of organized wall is enough to keep the rest of the room sane.
How do I make it feel welcoming, not utilitarian?
Repeat two finishes, add a plant, choose closed storage for the messiest category (usually shoes), and warm the light. The prettiest entry is the one that quietly works.

You don’t need an electrician—or permission from your landlord—to make a rented place glow. With the right rental lighting ideas, you can change the mood, make rooms feel larger, and highlight the best features without drilling a single hole. Think plug-in sconces, rechargeable lamps, peel-and-stick LED strips, and smart bulbs you can take with you when you move. This guide gives you a renter’s playbook: what to buy, where to place it, how bright it should be, and how to style it so every switch-on feels intentional.
“Light is the quickest way to change the feeling of a room.”
The renter’s rulebook (so you get your deposit back)

- No holes, no hardwiring: Use adhesive hooks/strips, freestanding fixtures, tension rods, and clamp bases.
- Everything reversible: Choose removable cable clips, renter-safe adhesive channels, and plug-in dimmers.
- Label before you stash: Keep original hardware and bulbs in a zip bag; it makes move-out painless.
- Mind the load: Don’t daisy-chain power strips; check wattage and use surge-protected extension cords.
- Leave it better: Goo-gone for adhesive residue, magic eraser for scuffs, gentle paint-safe tape only.
Lighting layers: the “3 + 1” formula
Great rooms share one habit: they layer light. Use this simple formula in every space:
- Ambient (the overall wash): floor lamps, big shades, paper lanterns
- Task (focused pools): desk, bedside, under-cabinet, reading spots
- Accent (drama + depth): picture lights, LED strips, uplights
- Control (dimmers/timers): shape the mood, save energy
Color temperature cheat sheet
- 2700K–3000K (warm): living, bedroom, dining—soft and cozy
- 3500K–4000K (neutral): kitchens, baths, desks—crisp but friendly
- 5000K (daylight): only for plants or craft detail work; harsh at night
How bright is bright enough? (rough lumen targets)
- Living room ambient: 1,500–3,000 lm across multiple lamps
- Sofa reading task: 400–800 lm in a focused shade
- Bedroom overall: 1,000–2,000 lm + 300–600 lm each bedside
- Kitchen prep: 1,500–3,000 lm total + strips under cabinets
- Bathroom mirror: 1,000–1,500 lm balanced from both sides
Zero-drill winners: renter-proof fixtures that look built-in
- Plug-in sconces with cord covers: Mount with adhesive backplates or picture-hanging strips; run the cord down a paintable adhesive channel to the outlet.
- Arc and tripod floor lamps: One footprint, room-size impact; great when the ceiling fixture is weak.
- Rechargeable table lamps: USB-charged, cable-free dinner lighting, perfect for tiny side tables and balconies.
- Puck lights (magnetic or adhesive): Tuck into wardrobes, pantries, bookcases; pick rechargeable or motion-sensor.
- LED strip lights (peel-and-stick): Under shelves, behind headboards, inside TV consoles; choose warm white.
- Clamp or clip lamps: Grab the edge of a shelf or headboard—studio-apartment friendly.
- Paper lantern pendants (plug-in): Hang from a ceiling hook with a cord swag; feather-light and forgiving.
- Tension-rod light bars: Span inside alcoves or closets; no screws, instant task light.
Room-by-room lighting playbook

Living room: bigger feel, calmer mood
- One tall floor lamp in a corner for ambient bounce.
- Two task lamps (sofa arm + reading chair) at eye height when seated.
- LED strip behind the TV or on the back of a media unit for glow without glare.
- Accent: a plug-in picture light or a small uplight behind a plant to give height.
Styling tip: Mix shade materials (linen for softness, metal for focus). Keep cords straight with clear adhesive clips and run them vertically—our eyes forgive straight lines.
Bedroom: soft landings, sleepy brains
- Warm bulbs only (2700K).
- Bedside sconces (plug-in) free the nightstand; install at shoulder height when sitting up.
- Rechargeable lamp for wind-down reading if outlets are scarce.
- LED strip behind the headboard or under the bed frame for a hotel-like halo.
- Blackout + sheer combo: Light by day, sleep by night. Use tension rods if drilling is banned.
Quiet hack: Put a smart plug on bedside lamps and create a “Goodnight” scene that dims over 15 minutes.
Kitchen: rental proof, chef ready
- Under-cabinet light bars or LED strips (adhesive) for counters—instant task light.
- Clip lamp or magnetic bar light under open shelves.
- Neutral white bulbs (3500–4000K) to keep food colors true.
- Motion-sensor puck inside the pantry.
Cord discipline: Route leads along underside of cabinets with mini cable clips; drop down at the nearest outlet to keep walls clean.
Bathroom: flattering, not flat
- Side-mounted task (two plug-in sconces on either side of the mirror) beats overhead glare.
- LED strip under the vanity face or along a shelf edge for night navigation.
- Neutral-to-warm bulbs (3000–3500K) flatter skin and tile.
- Rechargeable mirror light clips across the top if you can’t add sconces.
Moisture note: Choose damp-rated strips/fixtures and keep cords off wet zones.
Entryway: five seconds to feel organized
- Slim console lamp on a timer or smart motion routine.
- Battery picture light above a mirror for height.
- Puck lights inside the coat closet and shoe cupboard.
Work-from-home corner: bright ideas, low glare
- Task lamp with a matte shade angled away from the screen.
- Neutral white bulb (3500–4000K) reduces eye strain.
- Backlight the monitor with a small strip to reduce contrast at night.
Balcony / patio (always check building rules)
- Rechargeable lanterns or solar string lights.
- Outdoor-rated only; secure cables with UV-stable ties.
- Warm white keeps it cozy after sunset.
Make it look custom (without custom work)

- Cord covers you can paint: Adhesive raceways blend into the wall—paint to match.
- Swag it right: Command ceiling hooks + fabric cord = faux pendant moment.
- Lamp shade swap: Change the shade shape/texture to “upgrade” budget lamps.
- Symmetry trick: Two matching plug-in sconces frame a sofa or bed like built-ins.
Budget game plan: spend where it shows, save where it glows
| Category | Smart spend | Save here |
|---|---|---|
| Statement piece | A tall floor lamp or sculptural pendant | Shade swaps for existing lamps |
| Everyday light | Quality warm bulbs, plug-in dimmers | Multi-packs of LED strips/pucks |
| Control | Smart plugs for scenes/timers | Manual in-line dimmers for single lamps |
| Accent | One great picture light | DIY uplight (clip lamp pointed at wall) |
ROI you feel: A $35 warm LED strip under cabinets makes a rental kitchen feel designed every single day.
Quick placement cheats
- Lampshade height: Bottom of the shade at eye level when seated.
- Bedside sconce: ~20–30 cm above the top of your mattress, centred to your shoulder.
- Art light: 7–10 cm above the frame, tilted to wash the piece without glare.
- Reading pool: Light should land on the page from behind your shoulder.
Safety and sanity checklist
- Use LED bulbs (cool running, low energy).
- Keep soft furnishings 10+ cm from hot spots.
- Don’t run cords under rugs without a flat cable cover.
- Use surge-protected power strips; avoid overloading a single outlet.
- Dust shades and bulbs monthly—brighter light, cleaner air.
Small-space illusions using light
- Make ceilings feel higher: Aim light upward (arc lamp, uplight behind a plant).
- Widen a narrow room: Light both long walls evenly; avoid a single hotspot.
- Calm the clutter: A consistent warm color temperature ties eclectic pieces together.
- Depth for renters: Backlight shelves or curtain panels—creates layers and shadows.
The renter’s cord kit (throw this in a drawer)
- 2–3 plug-in dimmers
- Smart plugs (two-pack is fine)
- Adhesive cord clips + paintable cord channel
- Extension cord with a right-angle plug (fits behind furniture)
- Felt pads and zip ties (keep lamps stable and cords tidy)
Mini mood recipes (copy/paste scenes)
- Movie night: TV bias light 30%, floor lamp 20%, table lamps off
- Dinner at home: Pendant/lantern 40%, two rechargeable lamps on the table 60%
- Sunday reset: Ambient 60%, task 60% (kitchen/desk), accent 20%
- Wind-down: Bedside 25%, headboard strip 10%, everything else off
Rental lighting ideas for events and hosting
- String lights canopy: Swag across the ceiling with clear hooks; anchor above curtain track to hide cords.
- Uplight the corners: Two cheap uplights aimed at walls = instant atmosphere.
- Rechargeable table lamps instead of candles—no wax, no smoke, all glow.
- One color family: Keep everything at warm white; mismatched color temps feel chaotic in photos.
Troubleshooting: fast fixes to common lighting problems
| Problem | Likely cause | Quick fix |
|---|---|---|
| Room feels flat | Only overhead light | Add two lamps at different heights + dim the ceiling light |
| Harsh, clinical vibe | Bulbs too cool (5000K) | Swap to 2700–3000K in living/sleep areas |
| Glare on TV | Lamp in front of screen | Move lamp to side wall or backlight the TV |
| Shadows on kitchen counter | Light behind you | Add under-cabinet strip toward the front edge |
| Bathroom mirror looks unkind | Single top light | Add two side lights at face height; warm bulbs |
Sample shopping list (under $200, typical 1-bed flat)

- 1 tall floor lamp (ambient)
- 2 bedside plug-in sconces or table lamps (task)
- 2 LED strip kits (kitchen + headboard)
- 4 rechargeable puck lights (closet, bookcase, entry cupboard)
- 2 smart plugs + 1 plug-in dimmer
- Adhesive cord channel + clear clips
Conclusion: light the life you want to live
Rentals come with rules, but light lets you rewrite the mood. Start with one corner—swap in warm bulbs, add a floor lamp, run a slim LED strip where your hands work or your eyes rest. Then layer: a task pool for reading, a glow behind the TV, a soft lamp to welcome you home. Every choice is reversible, portable, and yours to keep. That’s the beauty of smart, renter-friendly lighting: it makes today better and moves with you tomorrow.
FAQs
What are the best rental lighting ideas if I can only buy three things?
One tall floor lamp, a plug-in dimmer, and an LED strip kit. You’ll get ambient, control, and task light instantly.
How do I hide cords without drilling?
Use paintable adhesive cord channels down the wall and clear clips along baseboards. Keep runs straight; it looks intentional.
Warm or cool bulbs—what should I pick?
Warm (2700–3000K) for living and sleeping, neutral (3500–4000K) for cooking and tasks. Staying consistent within a room keeps it calm.
Can I make a pendant without wiring?
Yes. Use a plug-in pendant kit, a paper lantern shade, and ceiling-safe adhesive hooks to swag the cord to a wall outlet.
Are LED strips safe on painted walls?
Choose reputable brands with removable adhesive, test a 10 cm piece first, and warm the strip with a hairdryer on low when you remove it.
How bright should a bedside lamp be for reading?
Aim for 400–600 lumens with a shade that directs light to the page, not into your eyes.
What’s a renter-friendly way to light art?
Battery picture lights or a plug-in sconce above the frame with an adhesive cord cover.
My kitchen is dark and I can’t drill. Any fix?
Adhesive under-cabinet light bars or strips along the front underside of cabinets. Run the cord down the wall in a channel to the nearest outlet.
How do I create a cozy vibe fast before guests arrive?
Turn off the overhead, set table/floor lamps to 30–40%, and add one warm accent (LED strip behind plants or shelves).
Will smart plugs work with lamps that have knobs?
Yes—as long as the lamp switch is left in the “on” position. Then control on/off and schedules from the plug.
Light the room you have, not the one in the listing photos. With a few renter-proof moves, your home will feel warmer, calmer, and unmistakably yours—no drill required.
-

 Landlord Renewable Insurance3 semanas ago
Community Solar Insurance Guide: Protecting Shared Assets in 2026
-

 Blog3 meses ago
Create a Calm Living Room on a Budget (Real-World Guide)
-
 Blog3 meses ago
entryway organization for a small apartment: Smart, Stylish Hacks That Actually Work
-

 Sustainable Real Estate & Rentals3 semanas ago
Marketing Solar Amenities to Tenants: How to Command Premium Rents in 2026
-

 Green Tax Strategy & Compliance3 semanas ago
Cost Segregation for Solar: My Secret Weapon for Tax-Free Wealth
-

 Green Energy1 mes ago
Do Solar Panels Property Value Rental Stats Justify the Cost in 2025?
-

 Blog3 meses ago
Applying the One In, One Out Rule to Optimize Your Business (Practical Playbook)
-

 Blog3 meses ago
The Ultimate Daily Declutter Routine: 15-Minute Reset for Every Room